
I’ve mentioned a few times in previous articles that what makes Microsoft Clarity so wonderful is its simplicity. But don’t get me wrong, there are still plenty of advanced and powerful features.
In my opinion, one of the best features Clarity has to offer is its ability to filter any and all data by any criteria you want and then save those conditions for later use as Segments. Heatmaps, Session Recordings, and Dashboards can all be used with these Segments and Filters.
The filtering section gives you a variety of conditions to break down your data. The categories include user info, user actions, path, traffic, performance, session, page, and custom filters. These filters can be combined to really refine your conditions.
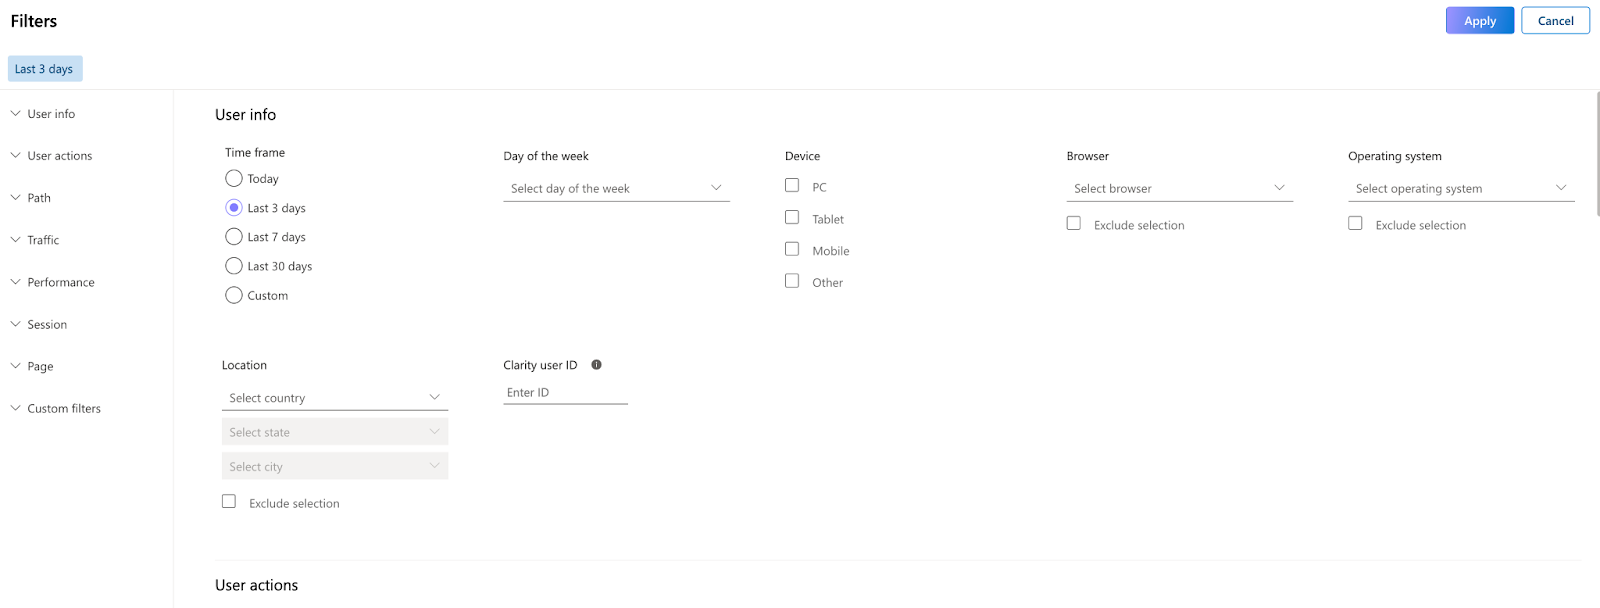
Let’s dive a bit deeper into each section.
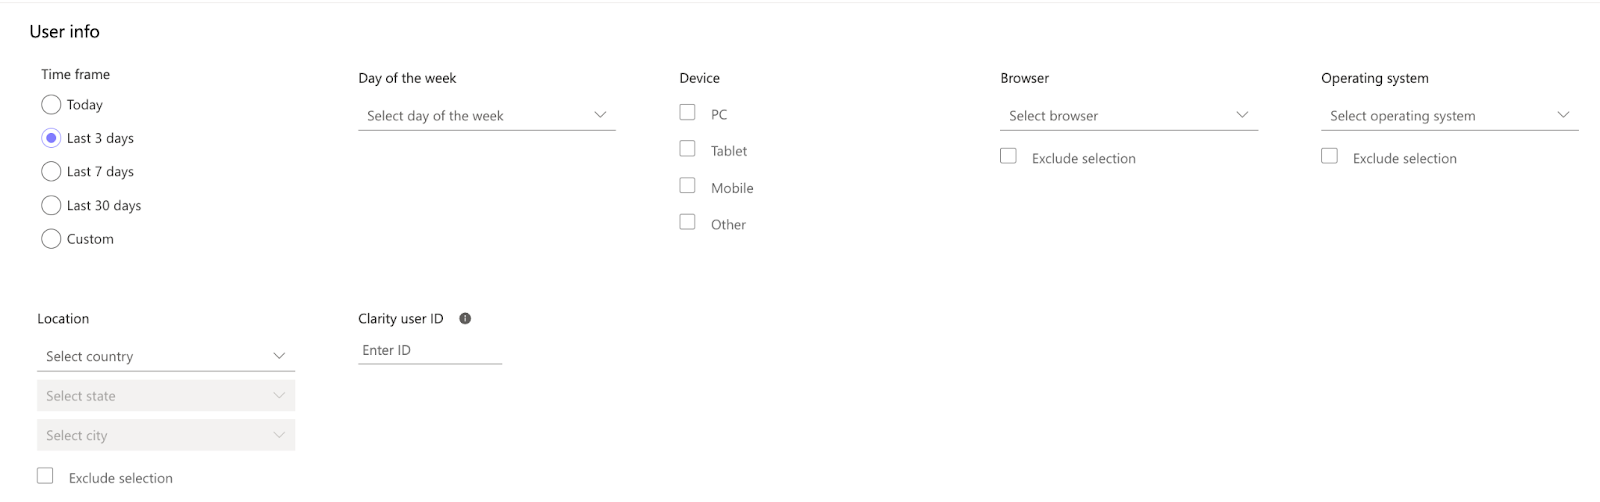
User Info
The User Info filters include user attributes and details about the user, such as the device they were on when visiting the website or their location. You can also filter by specific time frames in this section.
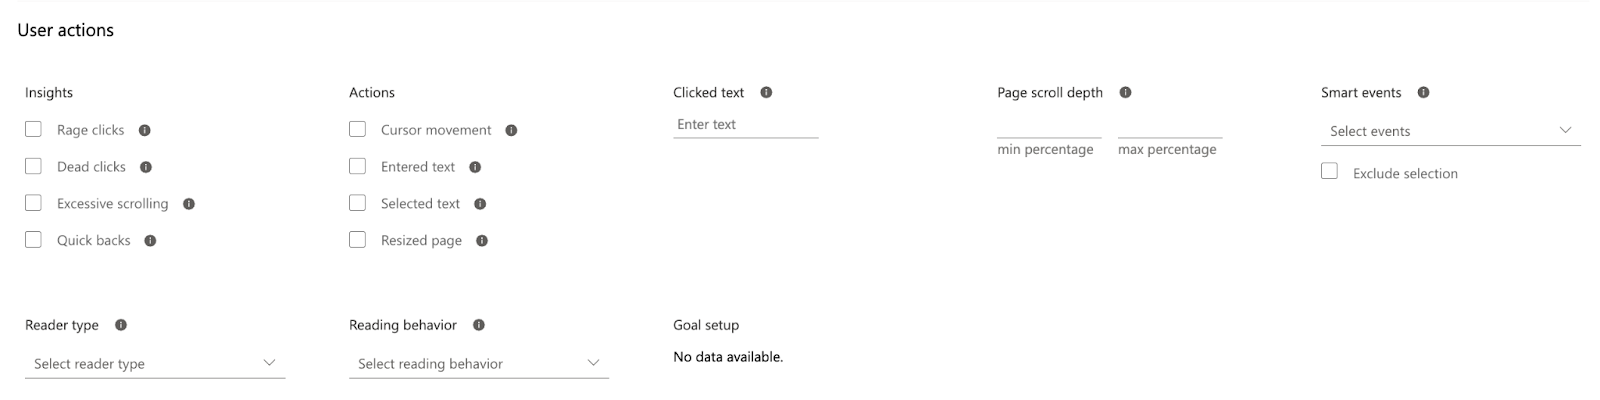
User Actions
The User Actions section focuses on actions a user has taken on the website. This includes click actions like rage clicks or scroll percentages. You can also add specific text that a user clicked (such as CTA text). If you’ve built smart events, you can include them as an option as well, so events like purchases and form fills will show up here. This can be super useful for drilling down to users who have added items to their cart but haven’t purchased or other key actions on your website. Another option is great for publishers: Clarity allows you to filter by reader type and reading behavior. You can find users who engaged with multiple articles or filter by whether they just saw a headline or finished the article.
Path
Next up is pathway filtering. This filter allows you to select a URL or series of URLs that the user visited. You can include or exclude the URL, and there’s an option for regex, making it easy to build complex URL conditions. Just remember that the condition is restricted to the date range selected in the User Info section, so they would need to have visited the URL in the last three days in this example. On Session Recordings and Dashboards, you can also drill down by exit and entry pages.

Traffic
The Traffic section allows you to drill down specific criteria surrounding where a user came from before they got to your website. This data is based on either referral traffic or UTM criteria.

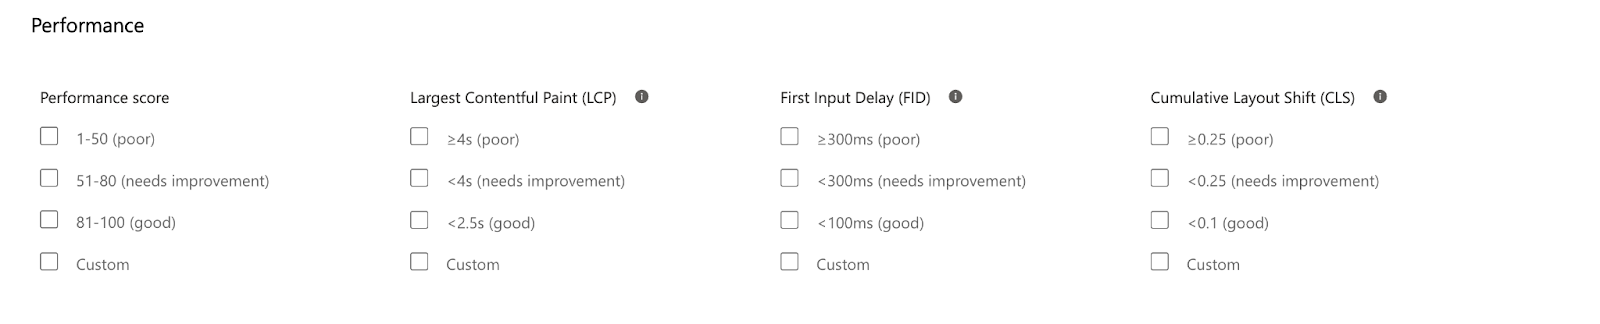
Performance
Performance allows you to compare audiences of users who have had different site-speed experiences. This enables you to determine whether site speed is having an impact on traffic and user behavior
Session
This section which is only available on Session Recording & Dashboards, allows you to drill down by criteria surrounding a visit on the website. You can drill down by how long a user was on the site, how many times they engaged, or how many pages they went to. This can be a great section when combined with grouped session trends.

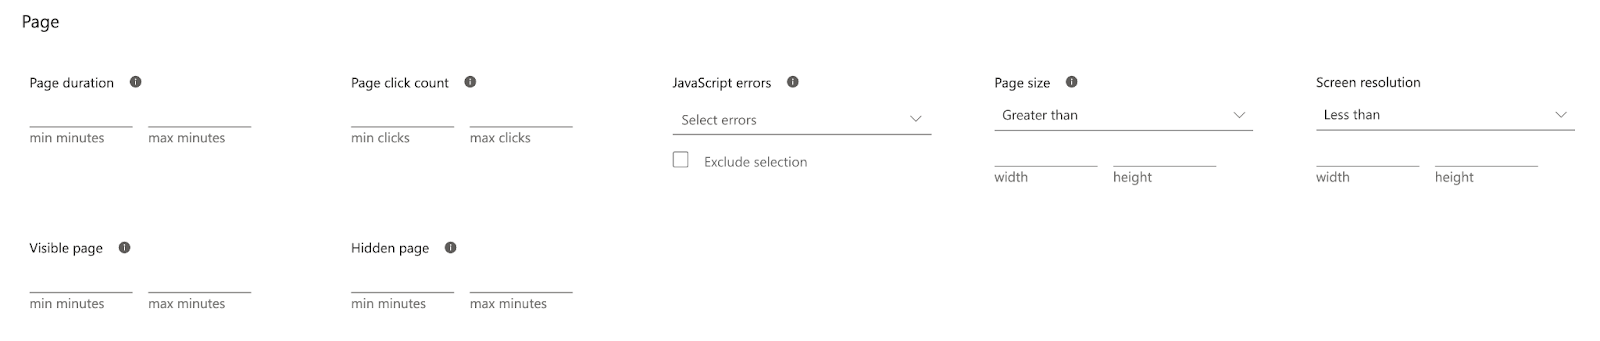
Page
Similar to Session, this section focuses on behavior but tailored to a specific page. You can filter by duration or click count on a page. You can also filter by specific errors a user experienced on a page (great for debugging), how large a page was, or if it was visible or hidden behind another tab.
Custom filters
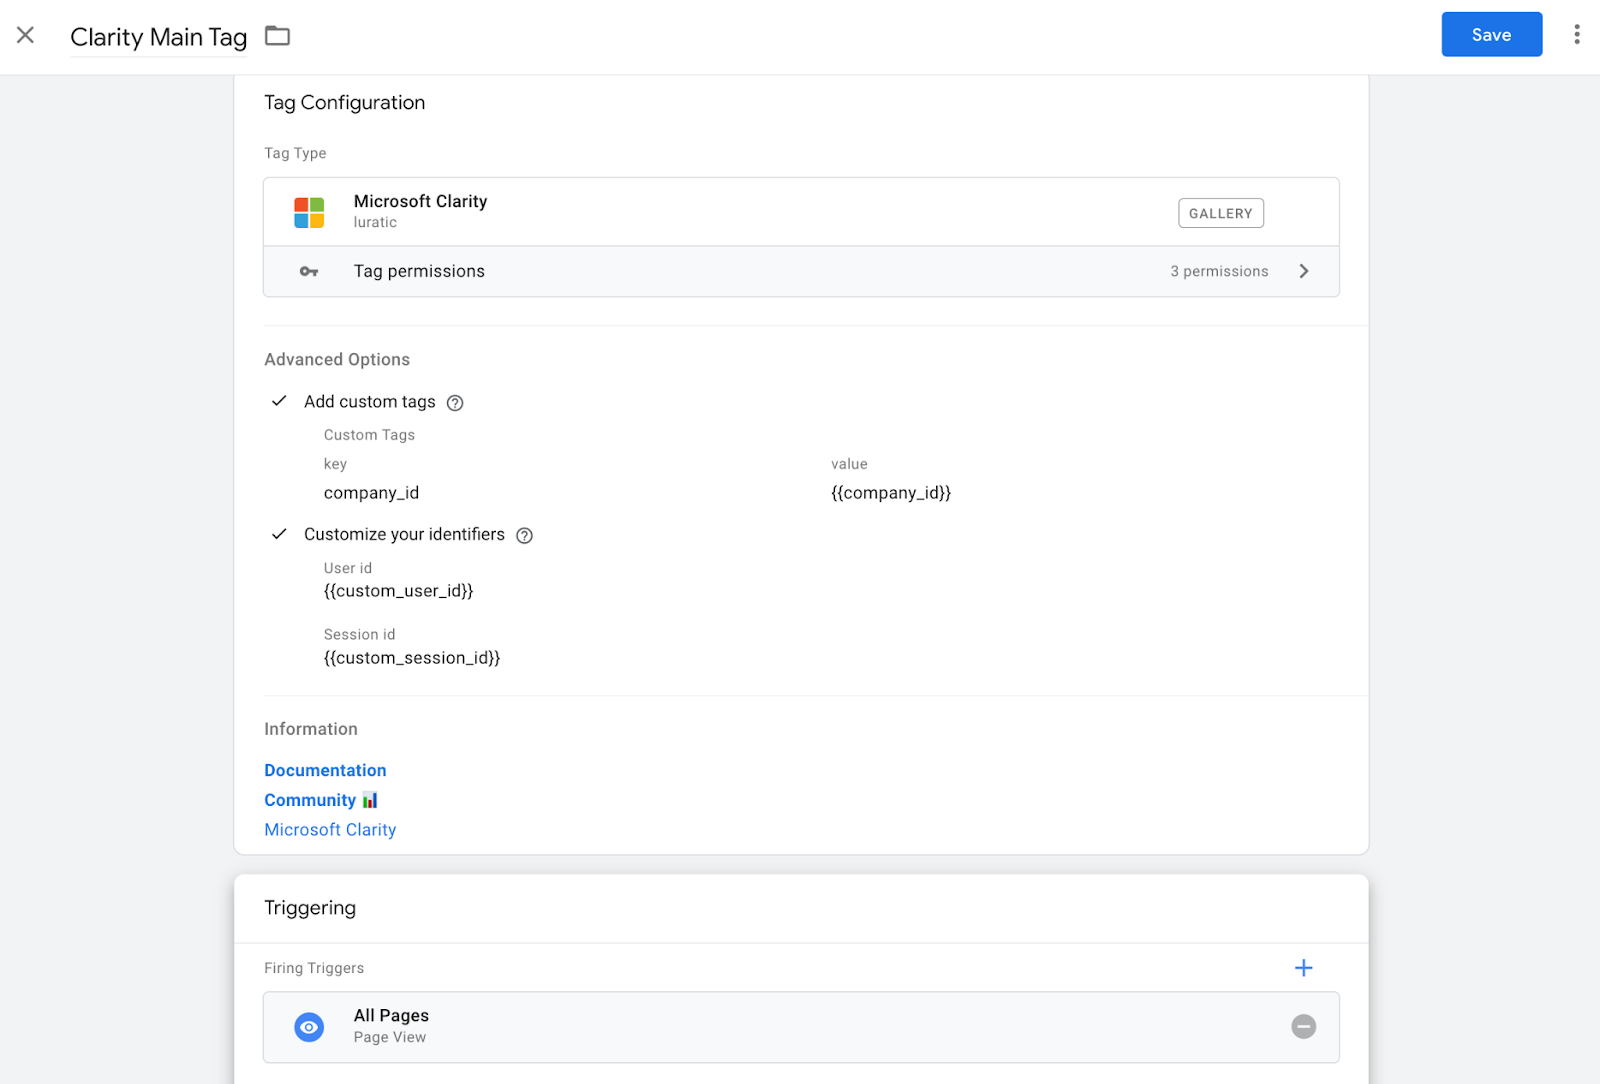
This section allows for infinite customization. You can use a tool like GTM to tag and send in custom filtering criteria. Examples include audience_ids, company_ids, A/B test groups, custom actions, content groupings, and more! Anything you can dream up and implement. Beyond tagging, you can leverage GTM or the Clarity Client API to send in custom user_ids (from your CDP), session ids, and page ids. This opens up a world of possibilities and can help you get the most out of features including CoPilot.

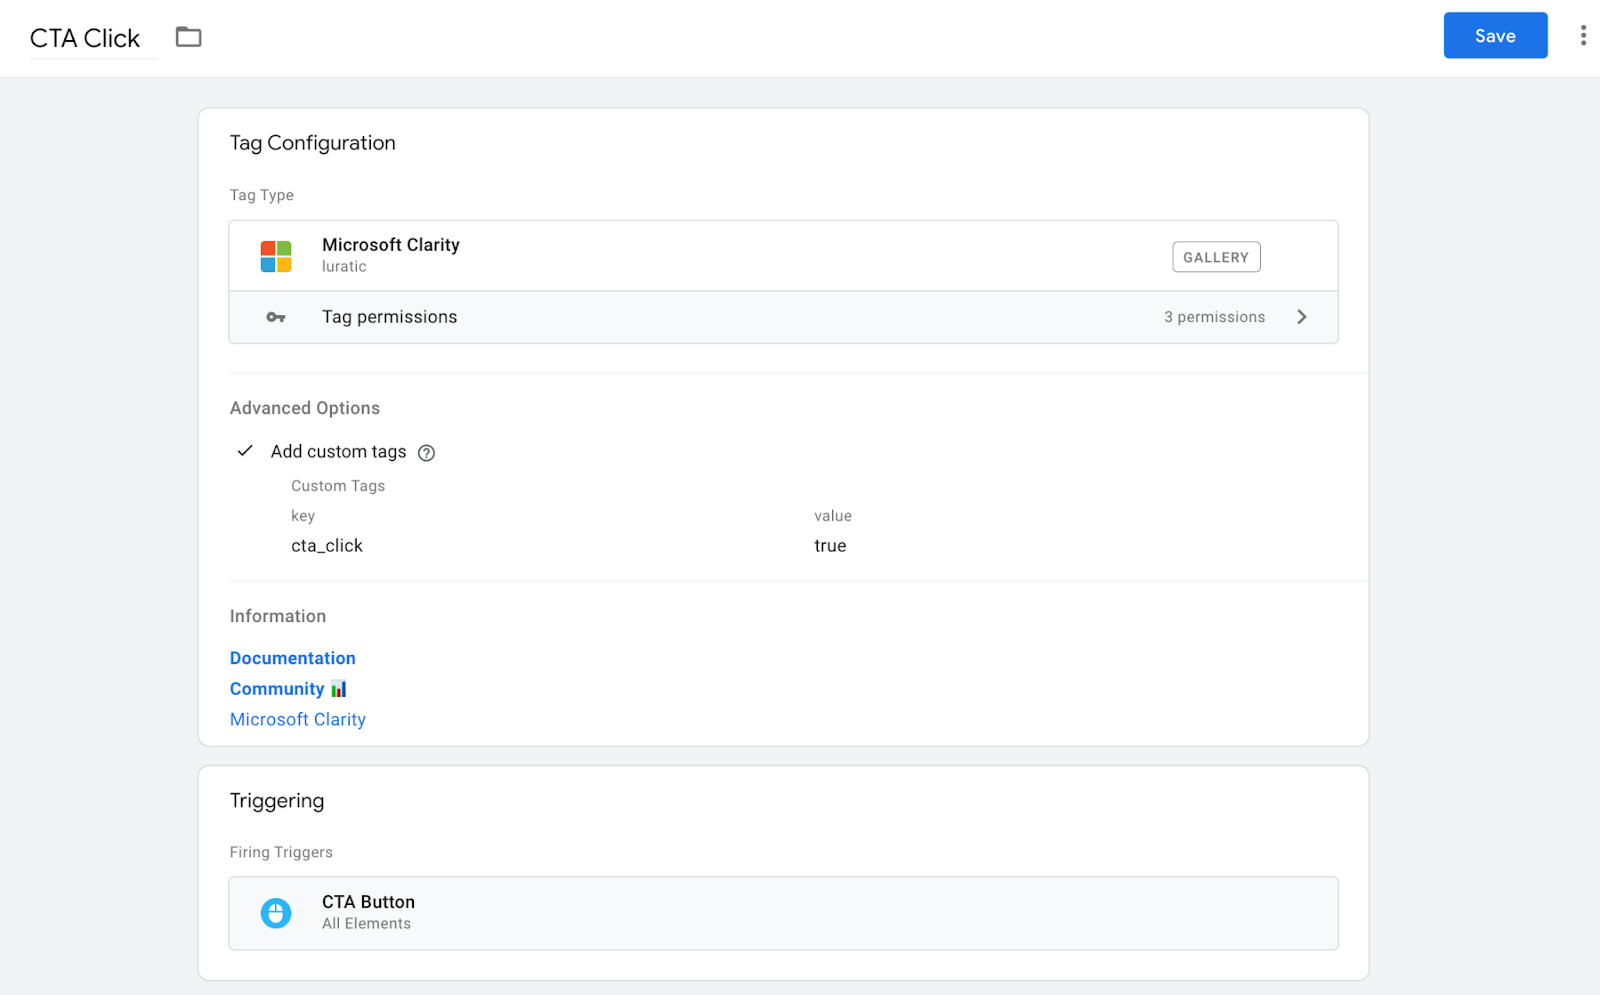
The easiest way to leverage custom filters is to use the Luratic Microsoft Clarity Template in GTM. Using this template, you can either add variables to the different filter fields globally
or choose specific events to fire custom filters on.
Saving Criteria & Creating Segments
Once you’ve selected your criteria (in this example, we’ll use Mobile Traffic that came from Organic Search in the last 30 days), you can save your criteria.

After applying those filters, they will be available in any tab you go to (Heatmaps, Session Recordings, Dashboards) as long as they are compatible with the tab.
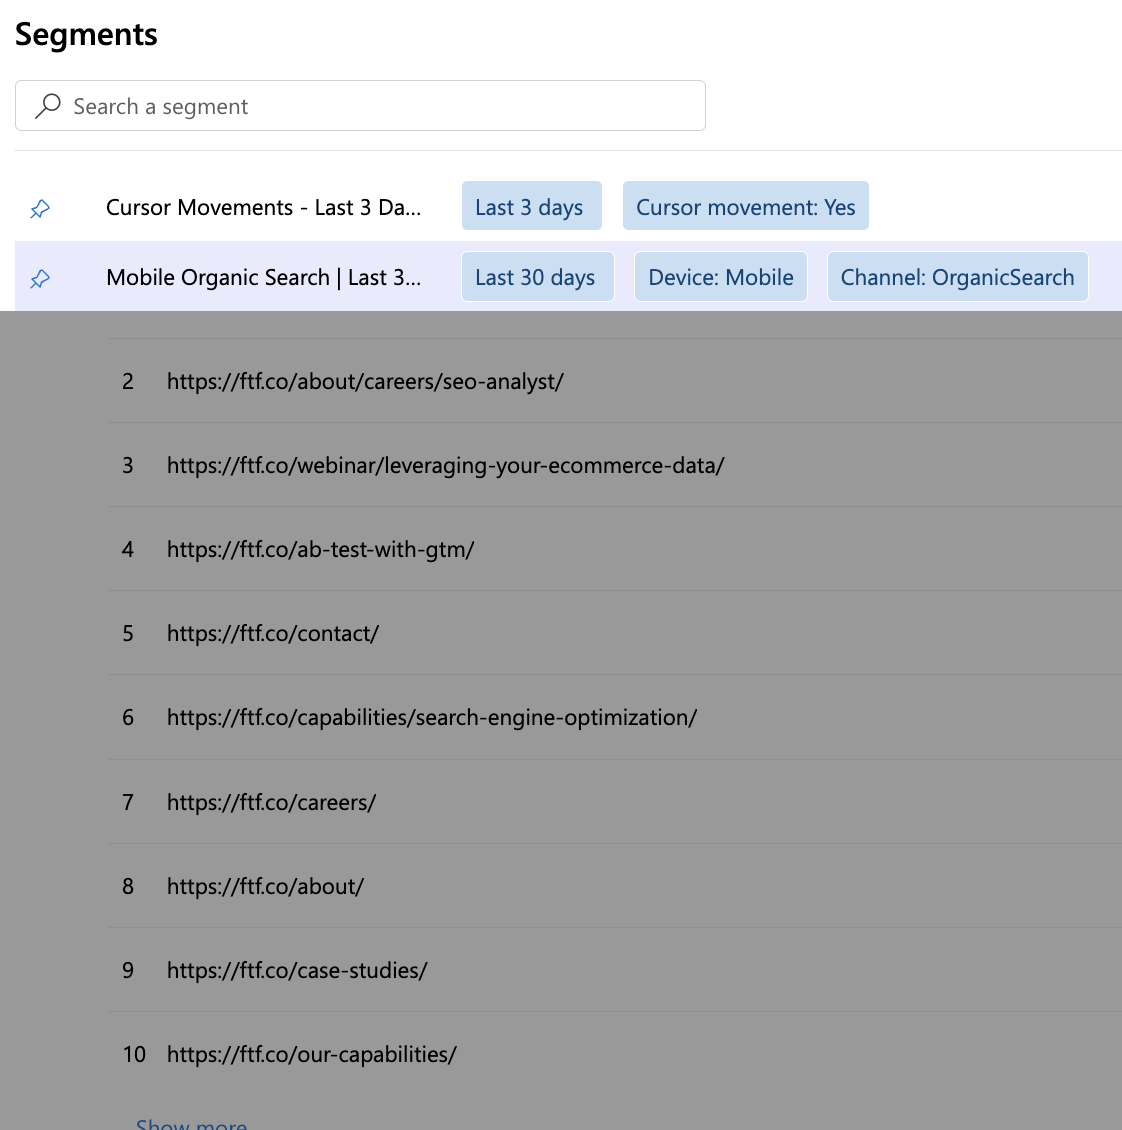
If you intend to use these filter criteria again and again, your next step would be to save them as a segment. Once you save it as a segment, you can name your user group.

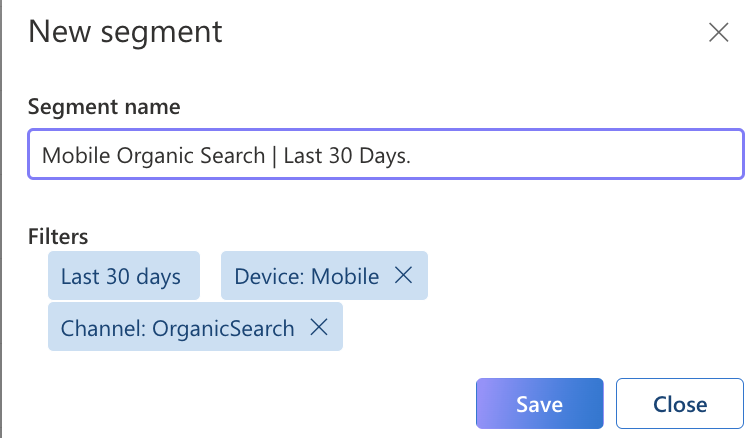
It will now be available in your saved segments to use as you’d like!
These Segments and Filters can be super useful for ultimate flexible analysis. They allow you to dive deep into any condition and get the most out of your Clarity data. And just remember, Copilot observes the data you filter as well, so it’s an easy path to getting the most out of the AI analysis features. Now that you have these tools at your fingertips, I encourage you to play around and explore! Until next time! Happy customizing!!
Check out more about using filters and segments in my deep dive video below!