Session recordings are powerful—but only if you know which sessions are worth watching.
Scrolling through random replays, hoping to stumble on insight, is not a strategy. It’s a time sink. And for publishers, marketing teams, and ecommerce operators trying to improve conversion rates, it’s one of the fastest ways to lose momentum.
That’s where Smart Events in Microsoft Clarity change the game.
Smart Events automatically surface the moments that actually matter: purchases, add-to-cart actions, form submissions, logins, contact requests, and more. Instead of hunting for insight, you start from intent. With them, every recording, heatmap, and dashboard starts with meaningful user action.
Even better: many Smart Events work out of the box. And when you need precision, Clarity gives you multiple ways to define exactly what “conversion” means on your site.
In this guide, you’ll learn:
- What Smart Events are and the four types available
- The nine predefined Auto Events Clarity detects automatically
- How to create Custom Smart Events directly in Clarity (no code)
- How to configure Events API tracking via Google Tag Manager for maximum accuracy
Let’s get into it.
The Four Types of Smart Events in Microsoft Clarity
Before configuring anything, it’s important to understand how Clarity categorizes Smart Events. Each type serves a different purpose—and comes with different tradeoffs.
Overview of Smart Event Types
| Type | Definition | How to Create | Strengths | Limitations |
| Auto Events | Automatically detected based on button text and interaction patterns | Generated by Clarity automatically | Zero setup, instant coverage | Less precise, potential false positives |
| Custom Events (UI) | User-defined events built from clicks, visits, or sequences | Clarity UI → Settings → Smart Events | No code, flexible logic | Max 20 per project, needs historical data |
| API Events | Events sent explicitly via JavaScript or tag manager | window.clarity(“event”, “eventName”) | Highest accuracy, full control | Requires technical setup |
| Page Visits | Events triggered by URL visits | Clarity UI → Page visit rules | Simple and fast | Tracks pageviews only |
For editing default Smart Events, Clarity’s documentation covers the mechanics in detail.
Which Approach Should You Use?
Which approach is ideal for you will depend on your organization’s tracking goals and technical capabilities.
Auto Events are designed to work immediately, with no setup required. For many teams, they provide fast visibility into common user actions and are often sufficient for exploratory analysis, UX reviews, and early optimization work.
However, when measurement accuracy becomes critical, the Clarity Events API via Google Tag Manager is the more reliable option.
Here’s why.
Auto Events infer intent based on observable signals like button text and interaction patterns. In most cases, that works well. But in real-world implementations—especially on non-English sites, highly customized interfaces, or complex ecommerce flows—those assumptions can occasionally diverge from how a business defines a true conversion.
At Tag Manager Italia, we’ve seen Auto Events in several ecommerce Clarity projects diverge from interaction counts in Google Analytics 4. Button-text matching alone isn’t enough when money is on the line.
The Events API solves this by letting you define exactly when an event should fire—such as after a server-side confirmation or on a verified success state—rather than relying on UI signals alone. That’s why, when accuracy directly impacts revenue or lead quality, we recommend API-based events.
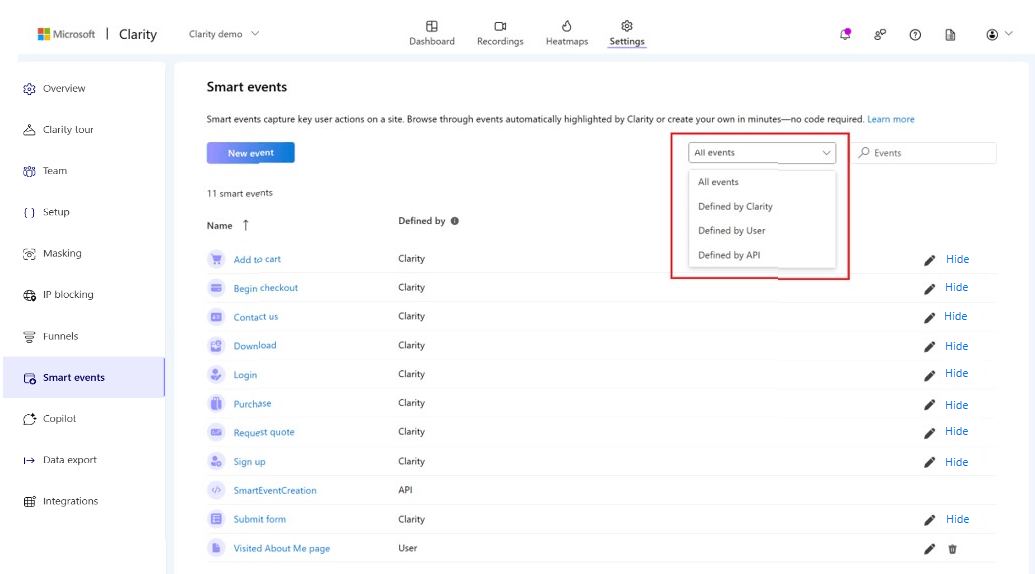
The 9 Predefined Auto Events in Clarity
Out of the box, Clarity automatically detects nine common user actions:
- Purchase — clicks on “Buy,” “Buy now,” “Place order”
- Add to Cart
- Begin Checkout
- Contact Us — email, phone, or contact buttons
- Submit Form
- Request Quote
- Sign Up
- Login
- Download
You can view these by navigating to Settings → Smart Events inside your Clarity project.
While these events are auto-generated, they are not fixed. You can edit them to refine which buttons, sequences, or interactions trigger each event.
For example, you might redefine begin checkout to fire only when a specific call-to-action is clicked, rather than any generic cart interaction.
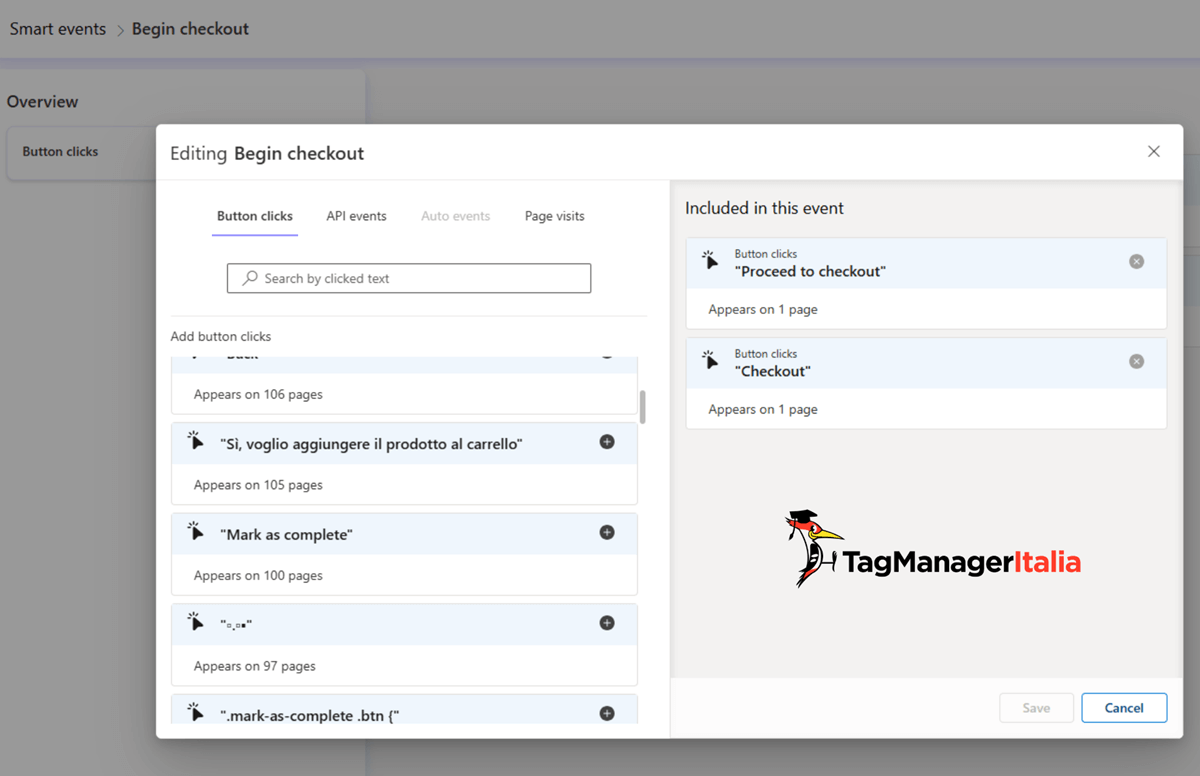
This flexibility is useful, but it still relies on inference. For mission-critical actions, explicit tracking is better.
Creating a Custom Smart Event in Clarity (No-Code)
Let’s start with the simplest customization: a UI-based Smart Event.
Example: Track visits to a “Request Demo” page on a B2B site.
Steps:
- Log into Clarity → Settings → Smart Events
- Click New Event
- Choose Start from scratch
- Select Page visits
- Define the condition:
- URL contains / matches / regex
- Example: https://yoursite.com/request-demo/
- Name the event (e.g. visit_request_demo)
- Save
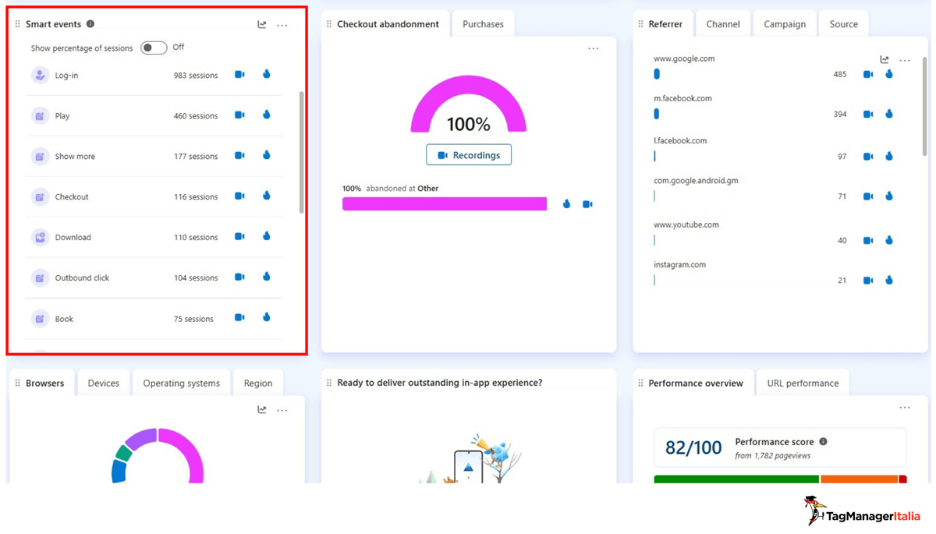
From that point forward, every visit to that page becomes a filterable event across recordings, heatmaps, and dashboards.
Simple. Effective. No code required.
Tracking Smart Events with the Events API (via Google Tag Manager)
When you need absolute precision—for purchases, qualified leads, or backend-confirmed actions—the Events API is the right tool.
Step 1 – Prerequisites
Before you start, make sure:
- Microsoft Clarity is installed and loading
- Google Tag Manager is active
- Key actions already exist in the dataLayer
Important: The Clarity script must load before events are sent.
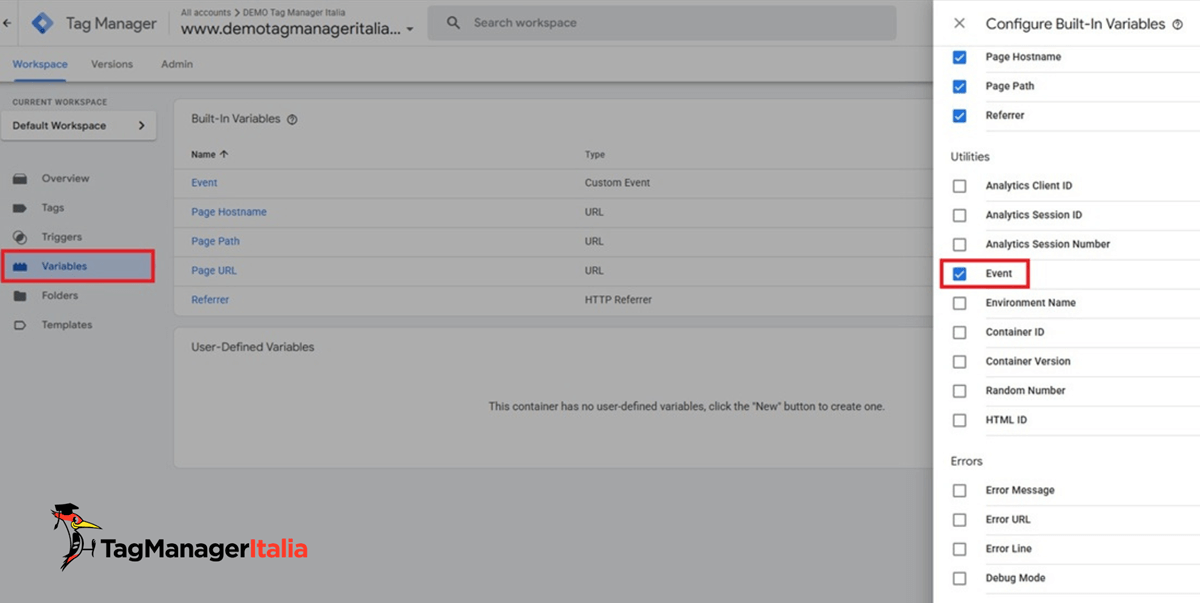
Step 2 – Enable the Built-In {{Event}} Variable
You don’t need one tag per event.
Instead, enable GTM’s built-in Event variable:
- GTM → Variables → Configure
- Enable Event under Utilities
This variable dynamically captures the event name pushed to the dataLayer—such as purchase, add_to_cart, or request_demo.
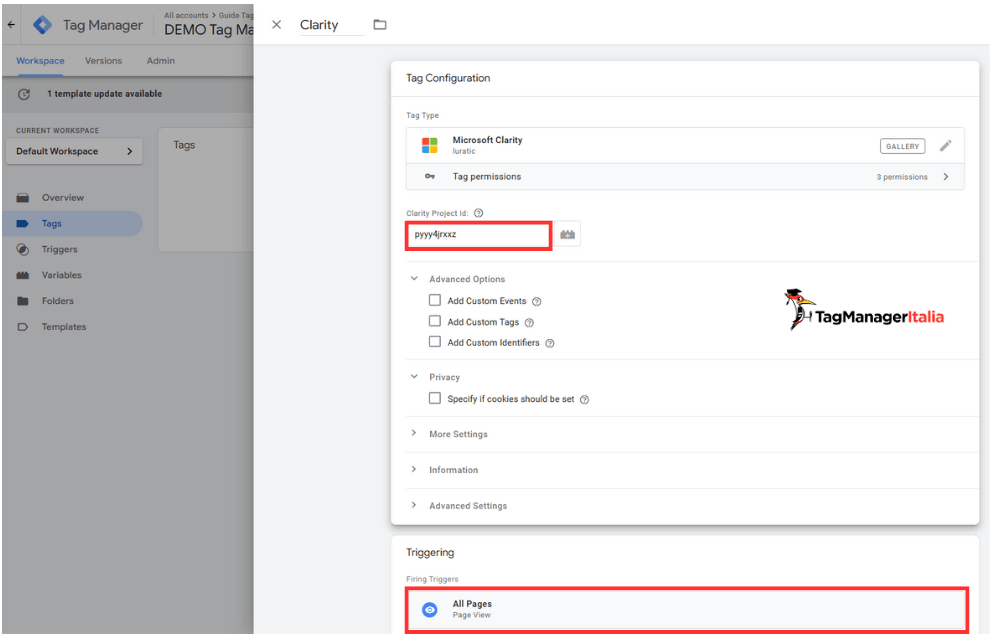
Step 3 – Create the Clarity Event Tag
Rather than using raw HTML, use the Clarity template from GTM’s Template Gallery.
- Tags → New → Template Gallery
- Search “Clarity”
- Select Microsoft Clarity – by luratic
- Enter your Clarity Project ID
- Enable Add Custom Events
- Set the event name to {{Event}}
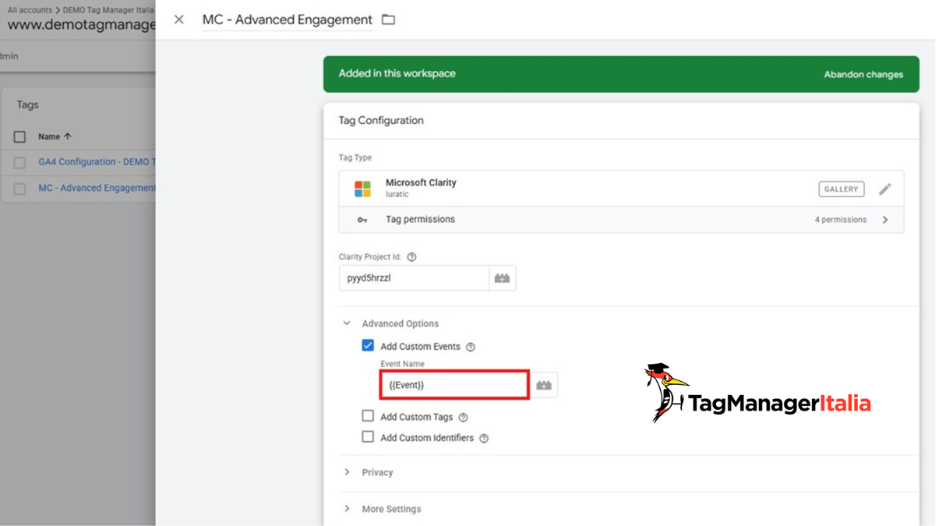
This allows any matching dataLayer event to be sent to Clarity automatically.
Step 4 – Filter Events with Regex
You don’t want to send GTM system events. Create a Custom Event trigger using regex to include only meaningful actions.
Examples:
Ecommerce events
purchase|add_to_cart|begin_checkout|view_cart
Lead generation
form_submit|request_demo|newsletter_signup|generate_lead
Ensure event names match your dataLayer exactly.
Step 5 – Verify in GTM Debug Mode
Before publishing:
- Use GTM Preview
- Trigger an event on your site
- Confirm:
- Event appears in the timeline
- Clarity tag fires
- {{Event}} resolves correctly
- No console errors
If it doesn’t fire, check your regex and event naming.
Step 6 – Verify in Microsoft Clarity

API Events take time to process.
Once available:
- Go to Settings → Smart Events
- Look for events labeled API
- Use them to:
- Filter recordings and heatmaps
- Build dashboards
- Create conversion funnels
If events appear correctly, publish your GTM container.
Conclusion
At this point, Clarity is no longer just recording behavior. It’s structuring data and insights around intent.
You’ve built a system that automatically highlights the sessions that matter most—without manual review, guesswork, or noise.
That’s the real power of Smart Events.
Co-Founder of Tag Manager Italia, Matteo Zambon is an internationally recognized digital analyst, Google Beta and Alpha tester, and Microsoft Clarity Ambassador.
A university lecturer in the Digital Marketing Master’s program at Bergamo, Matteo is the only digital analyst in the world to have won two international awards: the “Golden Punchcard Prize” at Superweek — awarded for the best technical analytics solution — and the Quanties Award in the “Top Analytics Educator” category.
Matteo was also the first Italian ever invited to speak at the Marketing Analytics Summit in Phoenix (USA), an event that brings together the world’s leading analytics experts and top brands such as Microsoft, Amazon, Coca-Cola, and more.
Matteo was a pioneer in analytics education — the first Italian professional to create guides, tutorials, courses, and books dedicated to Google Tag Manager and Google Analytics. Today he continues to share resources, live sessions, and in-depth content to help marketers and advertising professionals understand and apply analytics tools and methodologies in a correct and strategic way.
This article was originally published on Tag Manager Italia.